Quantcast
Channel: OpenEnergyMonitor
Viewing all 196 articles
Browse latest View live

Faire Maus! A 'fair' USB optical mouse

$
0
0
A few weeks ago I wrote a blog post about ethical and sustainable electronics.

In the post I mentioned a German project called Nager IT who have designed an optical USB mouse using low carbon materials and have gone to great lengths to source ethically produced components with a transparent supply chain and exploitation free manufacture.

We have decided to support the Nager IT project by becoming a UK reseller of their 'Faire Maus' or fair mouse. This mouse is as good as it gets at the moment in terms of ethical and sustainable electronics.

The mouse is a well-made three-button USB optical scroll wheel mouse made using low carbon materials, ethically produced components with a transparent supply chain and exploitation free manufacture.

The mouse is now available for purchase on a non profit basis (for us) in our shop: http://shop.openenergymonitor.com/fair-usb-optical-mouse/


The mice are assembled by hand in Germany and feel very well made, the texture of the wood plastic enclosure feels good in the hand and the sleek and rubbery USB cable runs smoothy over the table.


The texture of the wood plastic enclosure feels good in the hand, every time I use it it reminds me that ethical and sustainable electronics is a goal which is worth pursuing.

Purchasing a fair mouse can be thought of like purchasing fair trade coffee; it might cost a little bit extra but you know that your doing good.

Checkout the great graphic Nager IT have produced illustrating their transparent supply chain behind this mouse.


Measuring building thermal performance - coheating tests

$
0
0
Improving the thermal performance of buildings is an area where some of the largest energy and carbon savings can be made. Building energy use and carbon emissions can be reduced by as much as 60-80% through better insulation, draught proofing (improved thermal performance) and heating efficiency and controls. But how do you go about working out the performance of your house and what measures are best to undertake to reach this level of performance improvement? Improving building fabric is expensive, how do you work out which measures will be most cost-effective? and how do you make sure that your house actually achieves the target performance? how do you measure and check it?

These are the questions I’m currently grappling with for my own house and the openenergymonitor lab, these are also the questions we’re trying to develop improved processes for answering with our work with Carbon Coop.

Here’s a graphic from the Centre for Alternative Technology’s Zero Carbon Report illustrating the kind of performance improvements that are possible:


The most common way to investigate domestic building performance is by using simple building energy models such as SAP:
http://openenergymonitor.blogspot.co.uk/2013/06/building-energy-modelling-carbon-coop.html

The accuracy of a model is always dependent on its input data and assumptions, work that has been done on comparing modelled energy consumption as calculated by SAP vs actual energy consumption show that there is often a discrepancy and in some cases the discrepancy is so large (even a 100% or more) as to undermine decisions made based on model outputs.

https://www.bsria.co.uk/download/asset/agm-2011-co-heating-tests-sarah-birchall.pdf
To rely therefore on modelled performance only can be misleading.

It is possible however to measure the total building thermal performance by measuring how much energy it takes to heat a building up to a given temperature above the outside temperature. This procedure is known as a coheating test and was pioneered by the Center for the Built Environment at Leeds Met University. (There's also a good info sheet on coheating tests here by Peter Warm www.peterwarm.co.uk/?dl_id=6)

The standard co-heating test involves heating building when unoccupied to an elevated internal temperature of 25C over a period of 1-3 weeks with electric heating and monitoring the electrical heat input, internal and external temperatures. Keeping the building unoccupied reduces unknown variables and so increases the accuracy of the measurement but it alongside the elevated temperature makes widespread testing of this kind difficult.

The question that several people have been asking and I’m aware of several groups working on this (@Housahedron and Richard Jack, lboro) is; can a method be developed for undertaking an ongoing co-heating equivalent test that can be undertaken while the building is being used, that could even measure thermal performance over time as measures are undertaken. The analogy is a car MPG meter but for your house.

Over the last few weeks I’ve been working on an approach that I think is showing promising results, it involves applying a dynamic model to realtime monitored heating input and external temperature data to model indoor temperature. The modelled internal temperature is then compared to the actual indoor temperature.


The model parameters that give a good match tell you the heat loss factor of your building and also it’s thermal mass. The heat loss factor is your MPG equivalent for household fabric thermal performance.

The model type is a multi stage resistor-capacitor model, using the resistor-capacitor analogy for thermal modelling is a standard approach used in many thermal models, there's an interesting page on it here: http://lpsa.swarthmore.edu/Systems/Thermal/SysThermalModel.html


This is all open source and the code so far is up on github here: https://github.com/emoncms/openbem,
There's also a forum thread here with a bit more information on the model and tests http://openenergymonitor.org/emon/node/2783

RaspberryPI: SD Cards, HDD, Gateway Forwarder

$
0
0
After several Raspberry Pi emonBase SD card failures between myself and Glyn in the last two weeks and the general experience of short SD card lifespan on the forums (SD cards have a limited number of writes), we thought we'd make a concerted effort this week to move the openenergymonitor Raspberry Pi documentation, pi images and pre-installed SD cards over to the more stable solutions:

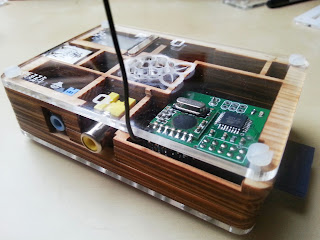
Raspberry Pi emonBase with RFM12Pi in Pibow Timber Case

1. We read Martin Harizanov's blog post on creating a rock-solid gateway using a read-only filesystem with Jerome Lafréchoux's excellent python oem_gateway to forward data to emoncms.org

This is a reliable solution which is simple to setup and works well if you just want to forward data to a remote emoncms server like emoncms.org. We have created a Raspberry Pi SD card image for this read-only filesystem oem_gateway setup, see documentation page for full details, there's a link to download it there too:


The ready-to-go pre-loaded SD card available in the shop will be pre-loaded with this image from now on. 

2. We also heard from Paul Reed about his setup where the SD card is just used to boot an external hard drive (powered by a USB hub) with the Pi's root partition running a web server and the full version of emoncms on the external hard drive. This solution is great if you want to keep your data locally or have an additional backup. This could also double up as a 24/7 file server running in your home for music streaming, document backup etc.

Glyn's using the read-only gateway for his setup and I'm going to setup the hard drive local backup in addition to forwarding to emoncms.org for mine.

Here's a diagram that illustrates these different options, including the NanodeRF, local and remote storage, backup options and emoncms data storage options (mysql, timestore etc):
If your not sure which way to go, its probably easiest to start with the Raspberry Pi oem_gateway forwarder to emoncms.org, you can re-configure it for local storage and backup via an external harddrive if you want later. If your more comfortable with Arduino code than the Raspberry Pi and linux then the NanodeRF (pre-assembled SMT) may be best for you.

To summarise the above with pros and cons, here are the two main emonBase Raspberry Pi options:

1. Run a read only filesystem on the Pi and forward data straight to a remote emoncms server.
Developed by Jerome Lafréchoux and Martin Harizanov's
http://harizanov.com/2013/08/rock-solid-rfm2pi-gateway-solution/
  • + More robust and easier to setup
  • + Cheaper and lower power than using an external HDD
  • - Does not utilise the full potential of the Pi
  • Run IPE – Industrial Perennial Environment a special blackout-proof flavour of Raspbian which can be locked down after setup to work in read only mode
  • The Oem Gateway Python script by Jérôme Lafréchoux to forward the data received by the RFM12Pi straight to emoncms.org
2. Move the Pi's file system to an external HDD using the SD card only to boot 
This option requires an external hard drive connected to the Pi through a powered USB hub. This does require extra expense and an increase in power consumption, the hard drive we tested here a 1TB USB hard drive adds 1.8W to the power consumption of the Pi (3.9W). However this option does have several advantages:
  • + Ability to run emoncms on the Pi to log data locally and have full control over your setup as well as forwarding data to a remote emoncms server.
  • + You now have the potential to have 24/7 file server running in your house for music streaming document backup etc.
  • - More complicated to setup
  • - Higher cost and power consumption

Backing up your raspberrypi emoncms or emoncms.org account

$
0
0
I've added a couple of scripts to the emoncms usefulscripts directory that makes backing up an emoncms account whether on a local raspberrypi or emoncms.org much easier than the sync module solution, although still not as easy as I would like it to be, I would like setting up a backup to be as easy as installing a dropbox client. 

The scripts work with Linux at the moment, hopefully soon I'l get a solution running on Windows. I would highly recommend keeping your own backup of your data, a backup of your emoncms data on your main computer can also be useful for both quicker access to the data and doing additional analysis of the data.
1) Install emoncmson your backup machine following the guide here: http://emoncms.org/site/docs/installlinux
Create an account and note down your mysql credentials.

2) Download the usefulscripts repository
https://github.com/emoncms/usefulscripts

There are two scripts available under usefulscripts/replication

  • import_full.php
  • import_inputs.php

3) Try importing your inputs first to test that it works: Open to edit import_inputs.php.
Set your mysql database name, username and password, the same credentials as for the settings.php step of the emoncms installation. Set the $server variable to the location of the raspberrypi or emoncms.org account you want to backup and set the $apikey to the write apikey of that account.

In terminal, goto the usefulscripts/replication directory. Run import_inputs.php:

    php import_inputs.php

If successful you should now see your input list and all input processing information backed up in your local emoncms account.

4) Backup all your feed data:

As for importing inputs open import_full.php and set the database credentials and remote emoncms account details.

Run the backup script with sudo

    sudo php import_full.php

That's it, it should now work through all your feeds whether mysql or timestore (no phptimeseries support yet) making a local backup. When you first run this script it can take a long time. When you run this script again it will only download the most recent data and so will complete much faster. I run this script once every few days to keep an up-to-date backup.

Website Backup

$
0
0
In the interest of open-source I thought I would share the backup setup we have running for the OpenEnergyMonitor website. I'm relatively new to sys-admin tasks and writing bash scripts so please suggest if you think if something could be implemented better.

Backing up our Drupal SQL databases which contain the user credentials and all the forum and text content of the website was relatively easy since the disk space they take up is relatively small. A nightly SQL dump then a scheduled secure FTP bash script running as a nightly cronjob on a Raspberry Pi with external hard drive to download the zipped SQL database does the trick. The FTP login credentials are stored away from prying eyes in .netrc file (with chmod 600), two sets of credentials are required and the relevant .netrc file is copied to the home folder when needed.

cp netrc/.netrc1 .netrc
today=$(date +"%d-%b-%Y")
ftp -vp -z secure $HOST << EOT
ascii
cd /LOCATION OF SQL DUMP ON SERVER
get $db_name-$today_backup.gz $LOCAL_BACKUP/$db_name-$today_backup.gz
bye
EOT
rm .netrc


 Backing up the files (images, documents etc) is a bit more of an issue since the ever increasing size of the content mean it's impractical and would unnecessary load the server and bandwidth to download a full snapshot every night.

I found wget has many customisable options. A nightly scheduled bash script running on a Raspberry Pi with an external hard drive with the following wget options looks at files have been created or modified since the last time the command was run and only downloads the changes. Once the initial download is done the command only takes less then a minute to execute and often only downloads a few Mb of data. The option '-N' tells wget only to download new or modified files

cp netrc/.netrc2 .netrc
wget -m -nv -N -l 0 -P $LOCAL_BACKUP ftp://$HOST/public_html/FILES_LOCATION -o $LOCAL_BACKUP/filelog=$today.txt
rm .netrc
# This is what the other options do:
# -l 0 infinite level of recursive (folder depth)
# -m mirror
# -N only download new files
# -o logfile
# -b run in the background
# -q turn off logs
# -nv non-verbose logs
This setup seems to be working well. It has a few weak points and limitations that I can think of:
  • The wget files backup script only downloads new and modified files, it does not mirror the fact that a file could have been deleted on the server, the file would remain in the backup. 
  • The wget script does not keep historical snapshots meaning that if something bad was to happen it would not be possible to rollback to a certain date in history. Update: I have since had recommend to me Rsnapshot which is a backup utility based on Rsync. Rsnapshot looks great and can work over FTPS. My friend Ryan Brooks wrote a good blog post on how to set up Rsnapshot over FTPS
  • Currently the Raspberry Pi only has the one external 1TB hard drive used for backup, ideally this would be two hard drives in a raid array for double safety Backups are only done nightly, this is plenty good enough for us at the moment but might need to be improved in the future. 

I think it's amazing that a little £25 Raspberry Pi is powerful enough to handle backup for several websites. the Pi with an external 1TB hard drive connected through a USB hub consumes only 5.7W making it not too bad to leave on 24/7.

 One issue that I had initially with the Pi is that the external hard driver would move from /dev/sdb to /dev/sdc therefore loosing it's mount point. I think this was caused by the HDD momentarily losing power. Switching to using a Pimoroni PiHub to power the setup and mounting the drive by it's UUID instead of /dev/xxx reference in fstab fixed the problem: 

UUID=2921-FCE8 /home/pi/1TB vfat  user,umask=0000   0   0

I would be interested to hear if you think how the backup could be implemented more efficiently or more securely.

CarbonCoop & OpenEnergyMonitor build weekend, November 16 & 17th

$
0
0
After much re-arranging we've got the new date for the energy monitoring build weekend that we're hosting with Carbon Coop at MadLab in Manchester. Its now on the 16th and 17th of November.

Meetup page:
http://www.meetup.com/Eco-Home-Lab-Manchester/events/140046162/ 

As before there will be three main parts to the weekend:

Build an OpenEnergyMonitor system (Saturday 10AM - 6PM + Completion on Sunday if needed)


This is a chance to build a monitoring system with the support of others who have built systems before, Matt Fawcett and I will be on hand to help, we will walk through building the emontx energy monitoring sensor node and how to setup a raspberrypi basestation running emoncms.

With this you can explore and track changes in home electricity use over time via a web dashboard.


If you've already got an OpenEnergyMonitor system but need some help getting it to work your also welcome to attend this workshop, please bring your monitor along.

To complete the build you will need:

Emontx 868Mhz
Programmer - USB to serial UART
Mini USB cable
USB power adapter
• AC-AC Adapter - AC voltage sensor
Raspberry Pi - model B
RFM12Pi Raspberry Pi Expansion board kit 868Mhz
Micro USB Cable
USB Power supply for RaspberryPI
• Sandisk SD card for the Raspberrypi
• 1 mtr cat-5 cable

The total build price if you get everything from the OpenEnergyMonitor shop is £121.5 inc VAT.

If you already have a raspberry pi and spare USB Power supplies, micro and mini USB cables (they often come with newer mobile phones) you can do the whole build for £68.50.

There will be a limited number of these kits available on the day (at the same cost), to make sure you can build please order these beforehand.

Put a note in your order message that you need the kits for the weekend so that we can make sure you have them.

If you want to read-up on the build guides and learn more about the system before the event take a look here:

http://openenergymonitor.org/emon/guide

Show and tell
 
Were excited that Robin Emley will be joining us to demonstrate his Solar PV Diverter on the Saturday: 
http://openenergymonitor.org/emon/mk2

If youd like to come and show what you've been working on around open source monitoring and control please do, get in contact to let us know if you are coming.

Hackathon

There will be a table dedicated to just developing something new, hardware or software. For example editing or amending the monitor's online display dashboards or improving energy modelling tools such as OpenSAP.

Sign up on the meetup page
Please add your name to the meetup page if your coming so that we have an idea about numbers and let us know how much of the kit you want for the build as above.
http://www.meetup.com/Eco-Home-Lab-Manchester/events/140046162/

We look forward to seeing you there! please get in contact if you have any questions:

trystanlea@openenergymonitor.org or matt@carbon.coop

emonTH Update - Hardware

$
0
0
Since my last post on the emonTH wireless Temperature and Humidity monitoring node good progress has been made.

emonTH cased up


emonTH - unboxed

The most significant hardware change has been the addition of a DC-DC step-up boost converter to step-up the voltage from discharging AA batteries to a steady 3.3V. The boost converter circuit consists of a tiny (SC-70 package) LTC3525-3.3 chip a 10uH inductor and a couple of small 1uF capacitors. The step-up converter is essential for the DHT22 as this sensor does not perform well with varying supply voltage,  specifically once below 3.3V. The addition of the converter will also significantly increase battery life. The LTC3525 was chosen because of its low quiescent power consumption of 7uA and high conversion efficiency of up to 95%.

emonTH LTC3525 DC-DC boost converter circuit

The boost circuit is very impressive, given a minimum input voltage of 0.7V it boosts up to a steady 3.3V.

Using scope with AC coupled probe to examine boost converter output when stepping 2V up to 3.3V with no load: output exhibited 9.3mV RMS ripple at 333Khz

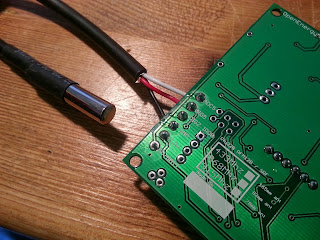
Testing  emonTH external DS18B20 temperature sensor terminal block connection

We hope to have the emonTH in the shop by December.

Stay tuned after the break for update on emonTH software, power consumption and batteries...

emonTH Update - Software and Power Consumption

$
0
0
Today I have spent some time writing the software for the emonTH. The goal for the emonTH is for it to last as long as possible from batteries (2 x AA's). The boost converter circuit as highlighted in my previous post will go someway to increasing battery life, however most gains in battery life will come from the software (ATmega328 Arduino sketch) .

The emonTH supports both the DHT22 (humidity and temperature) and DS18B20 either onboard or remote temperature sensor. The default software will search for the presence of either sensor at startup. If both sensors are found it will return humidity from the DHT22 and temperature from the DS128B20. If only the DHT22 is found it will return both humidity and temperature readings from this sensor, finally if only the DS18B20 is found only temperature readings will be returned. In the future I would like to expand the code to support multiple DS18B20 sensors on the one-wire bus.

I have implemented many of the power saving tricks as Martin Harizanov has used in his Funky Sensor code, in particular the his DS18B20 power saving tweaks. Martin has done some great work optimising power and designing some very small low power nodes, his blog is well worth a read.

The emonTH code (in beta) is now up on Github: https://github.com/openenergymonitor/emonth

The power consumption results are as follows, assuming one reading is taken per min and using this battery estimation tool assuming AA capacity of 2200mAh and not taking into account AA self-discharge*

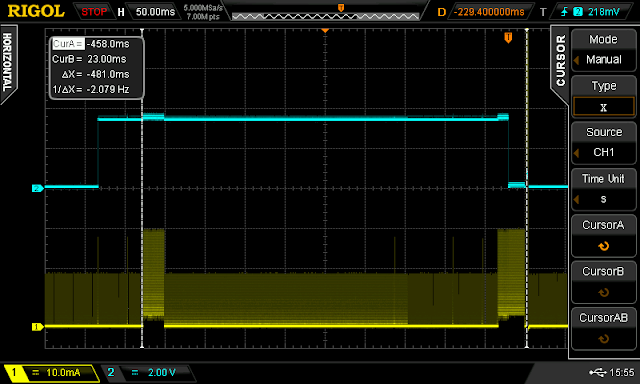
emonTH with DS18b20 temperature only (Vin = 2.6V)


Blue - DS18B20 power digital power pin, Yellow - voltage drop across series resistor. Due to switching noise from the DC converter the scope was not very useful for measuring current (voltage drop across a resistor), the scope was used to measure timings and power was measured with accurate multimeter 
Sleep Current: 0.12mA
On current: 9.7mA for 70ms then peaking to 26mA for 2.8ms for RFM12B transmission, giving average of 10.2mA for 9.8ms

Approximate battery life of 3.5 years*

emonTH with DHT22 (temperature & humidity) only (Vin = 2.6V)


Blue - DHT22 power digital power pin, Yellow - voltage drop across series resistor. Due to switching noise from the DC converter the scope was not very useful for measuring current (voltage drop across a resistor), the scope was used to measure timings and power was measured with accurate multimeter 

Sleep Current: 0.12mA
On current: 9.5mA for 1700ms then peaking to 26mA for 2.8 ms for RFM12B transmission giving average of 9.525mA for 1703ms

Approximate battery life of 1.1 years*


*Stay tuned for the next post on AA battery considerations including how to deal with self-discharge issues...

AA Battery Considerations

$
0
0
The manufacture of batteries is a very energy intensive process often using many types of heavy metals, it makes total sense to use rechargeable batteries where possible and always recycle old batteries. When it comes to low power sensing nodes I'm as guilty as anyone else when it comes to just sticking in some cheap alkaline batteries, always believing that the performance of rechargeable batteries was much lower. This is not the case anymore.

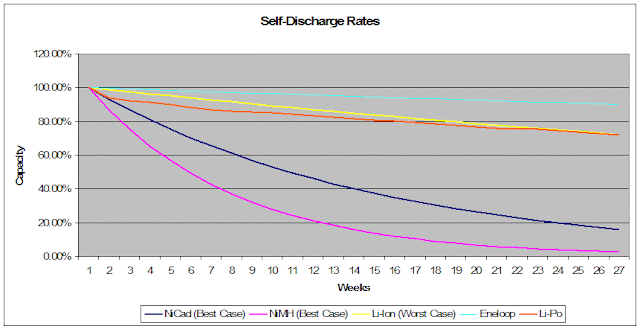
If rechargeable batteries are used (which they should be) the self-discharge rate can be significant. The self-discharge rate of NiMH batteries is high: around 30% per month at room temperature. This problem can be almost eliminated by using low-self discharge NiMH cells such as Eneloop, they have a discharge rate of about 5% per year. If non-rechargeable alkaline batteries are used they have a self-discharge rate of less than 2% per year.

Rechargable batteries self-discharge graph from batterydata.com
If you care about the environment (which we all should do) we highly recommend the use of Sanyo Eneloop rechargeable AA's in the emonTH and emonTx. They are a bit more expensive (about £2 each) but over their lifetime (they can be recharged 2100 times!) they will work out cheaper. The Eneloop cells are cadmium free and arrive fully charged and ready to use. Sanyo states that this charge is supplied by their solar PV system in Japan!


An excellent setup (as recommended by JCW of JeeLabs.org) is a spare set of Eneloop AA's (Apple AA's are rebranded Eneloops) permanently plugged in an Apple AA charger which he measured using 0W when the batteries are fully charged! This way you always have a set ready to go: http://jeelabs.org/2010/08/19/new-aa-battery-option/

Update: I've just discovered iGogreen's Alkaline Rechargeable batteries which claim to hold their charge for 7 years and contain no heavy metals : Mercury, Cadmium, Lead or Nickel. They do fall down for high power draw applications but this is not an issue here, maybe a perfect match for long term low power nodes? They are also cheaper than Eneloops. The only draw back is they they need a special charger, iGo do a reasonably priced nice looking USB charger which will also charge standard NiMH
iGogreen Alkaline Rechargeable Batteries


USB Alkaline Rechargeable / NiMH charger

Raspberry Pi - A new type of RAM

$
0
0
If you've had trouble booting up your Raspberry Pi then read on...

The latest batch of Raspberry Pi's we have been selling through the shop (manufactured in South Wales, UK) have use a new type of RAM chip.

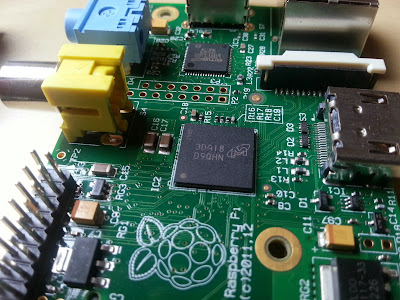
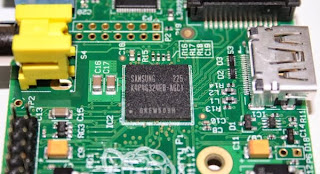
Previously the Pi used a Samsung chip, they have now switched to using a chip manufactured by Micron marked with 3KA18 D9QHN and an 'M' logo. This chip is visible in the middle of the photo below mounted on top of the processor using their cleaver package-on-package technology. This RAM chip is still 512Mb in size

Raspberry Pi with new type of RAM chip
Older Samsung RAM chip
To my knowledge there has been no evidence that the new chip give any performance benefit, the change is probably due to cost or logistic reasons. 

This new chip requires a firmware update to work. Our current SD card images (e.g oemgateway_24sep2013.img) won't boot with the new RAM; static red PWR LED and nothing else. 

To make the Raspberry Pi boot you will need to download the following files and put them in the SD cards FAT (boot) partition overwriting the older files: 

https://github.com/raspberrypi/firmware/raw/master/boot/fixup.dat
https://github.com/raspberrypi/firmware/raw/master/boot/bootcode.bin
https://github.com/raspberrypi/firmware/raw/master/boot/fixup_cd.dat
https://github.com/raspberrypi/firmware/raw/master/boot/fixup.dat
https://github.com/raspberrypi/firmware/raw/master/boot/fixup_x.dat
https://github.com/raspberrypi/firmware/raw/master/boot/kernel_emergency.img
https://github.com/raspberrypi/firmware/raw/master/boot/kernel.img
https://github.com/raspberrypi/firmware/raw/master/boot/start_cd.elf
https://github.com/raspberrypi/firmware/raw/master/boot/start.elf
https://github.com/raspberrypi/firmware/raw/master/boot/start_x.elf

Alternative you could download the whole Raspberry Pi firmware repository (95.6Mb) and copy out the files from the boot directory https://github.com/raspberrypi/firmware/archive/master.zip

I'm currently working on getting a new ready-to-go SD card image download uploaded with the changes above included. This should be available to download soon from: http://emoncms.org/site/docs/raspberrypigateway. Look for the 22nd Oct 2013 image.

All SD cards purchased in the shop after today will have the new image which works on the Raspberry Pi's with the new RAM.

Onwards! 

New office space and new hardware units

$
0
0
Thanks a lot for everyone's support, it feel like we're on the verge of starting a new chapter.

The next chapter sees us transferring from self-assembly through-hole kits to pre-assembled ready to go hardware units. This is a step change for us, making it easier to get systems up and running and onto the application (data visualisation and analysis) stage faster. From a Megni (business) point of view we're moving into a new office space and have got some extra pairs of hands helping us out. 

The OpenEnergyMonitor system as a whole can be thought of  as a toolkit for exploring sustainable and efficient energy in our buildings; a toolkit that helps us make informed decisions based on real data and in depth understanding rather than hear-say and overstated product brochures.
emonTx Arduino Shield V2 SMT due to launch in the shop beginning of December

OpenEnergyMonitor fits into and is part of the realisation of the smart, efficient low energy home vision.

The toolkit involves sensor nodes that are placed around a building that record data about the building's operation: its use of electricity, its thermal performance and humidity. The data from these sensors feed directly into visualisation tools as well as being integrated into building energy models that help make sense of this data.

The first part of this work is the monitoring and modelling layer providing you with information that can inform action, whether that's changing a fridge or lighting technology or adjusting heating patterns.

The second part is to integrate control, e.g. controlling a heat pump to heat a building using the most efficient heating pattern. That said, the first part is also control in a sense as it involves informing the user to then instigate some action.

Lots of exciting things to work on in 2014 and beyond! Let's finish with a nostalgic look back at our old lab space where the project was first conceived back in 2009..lots of happy memories:


In the next couple of weeks I will be travelling to Cambridge and Nottingham in the UK to oversee the SMT assembly of our new units, I will try and do some blogging as I go. Fingers crossed this all should go smoothly! If all goes well the new units should be in the shop at the end of November / beginning of December 2013.

Bulk SD Card Loading

$
0
0
Here's a neat little trick which should be useful for anyone needing to flash the same SD card .img onto lots of SD cards in parallel. We have been using it to load up the Raspberry Pi pre-loaded emoncms gateway SD cards. Thanks to @dpslwk for the initial idea.

Tested on Ubuntu Linux 13.10 64-bit

First install dcfldd which is an enhanced version of dd

$ sudo apt-get install dcfldd

I used a USB hub with five SD card readers

$ sudo fdisk -l 

can be used to determine the drive letter of the SD cards, depending on your hard disk configuration it will usually be something like /dev/sdx where x is b-f.  Make sure you check this carefully, selecting the wrong disk can result in one of your hard drives being wiped! dd is not nicknamed 'delete disk' for nothing!


Finally run dcfld selecting each SD card as the output file:

$ sudo dcfldd if=SD_CARD_IMAGE.img bs=4M sizeprobe=if of=/dev/sdb of=/dev/sdc of=/dev/sdd of=/dev/sde of=/dev/sdf

Flashing five SD cards with a 2GB image takes about 4 min for me:


Improving emoncms performance with Redis plus interesting consequences for SD cards.

$
0
0

As part of recent work to improve the performance of emoncms because of high load's on emoncms.org there is now an emoncms branch that uses redis to store feed and input meta data including last feed time and value fields which where causing significant write load on the server.

Using redis in this way leads to quite a big performance improvement and potentially could lengthen the lifespan of raspberrypi SD card systems significantly.

I've been working on the redis implementation with Ynyr Edwards a good friend and an experienced software developer who recently joined Glyn and I helping us with development and running the shop. Ynyr had been telling me about the usefulness of in memory databases and caching for improving performance for long time. There appeared to be a significant amount of waiting on io going on on emoncms.org and the mysql processlist was full of last time and value updates to the feeds meta data table.

In order to compare the use of mysql versus redis for storing input and feed meta data in emoncms a test was created that was representative of the typical kind of data input seen in emoncms.

The test consisted of a node posting 3 power values, with each value being “logged to a feed” processed into kwh/d data and histogram data. So 9 feeds in total, three of them timestore and 6 mysql based.

The node post rate was set to once a second and the time taken for each request was measured. After single request time's where measured a second test was carried out which involved sending request continuously and measuring the time taken to make 100 sequential requests from which the average requests per second value is determined.

Its important to note that the following results are for sequential requests rather than concurrent requests. Its possible to achieve significantly higher request rates with concurrent requests which spawn many parallel apache processes. Sequantial requests give us a good base line test to work with.

The CPU on the test machine was set to 2.0 GHz x 4 cores

Testing Mysql

The following results show the effect of turing off last input and feed time and value meta data entries in the pure mysql implementation:

Mysql with all metadata switched on:
10x sequential posts, 31ms to 79ms @ 4x 2GHz, average 20 sequential req/s.
With the processor set to 0.8GHz on all 4 cores the request rate was 10 sequential req/s

With a single poster process free-running the CPU is 7.4 us and wait is 11.5 wa

Mysql without input last time value being saved:
10x sequential, posts 26ms to 64ms, average: 25 sequential req/s

Mysql without input or feed last value but still histogram last value:
10x sequential posts: 18ms to 31ms, average: 46-48 req/s

Mysql without input or feed last value or histogram last value:
10x sequential posts: 10ms to 11ms, average 94-95 req/s

Redis 

Here are the results with the redis implementation that's up on github here:

All meta data enabled 11-14ms, 94-95req/s @ 2.0GHz
CPU us 22us, 0.0wa

CPU Performance:
In the redis test the CPU utilisation was around 22%, the mysql CPU utilisation was around 7.4%. Idle CPU us is around 0.2%. Redis is however handling 4.7x the number of requests, if it where handling the same number of requests the cpu us may be around 22/4.7 ~4.7% us.

Wait
We can see a significant reduction in the amount of time spent by the system waiting. With mysql every time a feed was updated, the time and value of the update was written to the mysql feeds table. The first idea was that this waiting was caused by waiting on mysql table locks, testing however with both MYISAM and InnoDB showed similar overall performance even through InnoDB is row locking while MyIsam table level locking. Looking at the disk write rate with vmstat and iotop however showed a really high write rate with mysql so it may be that the waiting was just waiting because the disk was working so hard, see more on this below.

IO Disk write rate:
Here is the output from vmstat with the apache access and redis logs turned off.

Redis

procs -----------memory---------- ---swap-- -----io---- -system-- ----cpu----

r b swpd free buff cache si so bi bo in cs us sy id wa

2 0 0 4282700 352236 2002508 0 0 0 0 1670 44128 20 7 72 0

1 0 0 4281496 352236 2002976 0 0 0 43 1622 44148 20 7 73 0

1 0 0 4280636 352236 2003440 0 0 0 0 1651 44424 21 7 72 0

1 0 0 4280096 352236 2003952 0 0 0 1793 1678 43999 21 6 72 0

1 0 0 4279316 352236 2004416 0 0 0 49 1658 44106 20 7 73 0

MySQL


procs -----------memory---------- ---swap-- -----io---- -system-- ----cpu----

r b swpd free buff cache si so bi bo in cs us sy id wa

1 0 0 4264420 352244 2041008 0 0 0 4280 1695 14833 7 3 79 11

1 0 0 4264904 352248 2039972 0 0 0 4296 1777 15615 8 3 78 11

1 0 0 4264664 352252 2040312 0 0 0 4477 1713 15072 7 3 79 12

1 0 0 4264440 352264 2040420 0 0 0 4355 1700 14982 7 2 79 11

0 1 0 4267364 352284 2037604 0 0 0 4332 1712 15012 7 2 79 12

Using a larger number of vm readings than the 5 listed above the average redis input was 215kb/s and mysql 4430kb/s, idle being 4kb/s. First its surprising how high the mysql write rate is and then second its surprising how large the reduction in the amount of disk writing done is, about 21x less and that's with 4.7 times the post rate. The reduction in the amount of writing could therefore be as much as 100x. The quanitiy of writes cannot only be explained by the kind of writes that are being done in emoncms, most of it appears to be due to ext4 filesystem journaling (61.16% of write capacity) while mysql is only responsible for a couple of percent.

MySQL iotop
Redis iotop 


Journaling
"A journaling file system is a file system that keeps track of the changes that will be made in a journal (usually a circular log in a dedicated area of the file system) before committing them to the main file system. In the event of a system crash or power failure, such file systems are quicker to bring back online and less likely to become corrupted" - http://en.wikipedia.org/wiki/Journaling_file_system.


Raspberry PI SD card installation
The problem with running emoncms on SD cards was that we where wearing the SD cards out in only a few months. If redis reduces the amount of writing by around 100x then this could mean a significantly longer SD card life span.

If in addition to using redis a filesystem without journaling is used the lifespan could be extended even further, although this does increase the risk of data corruption from power failure, but then if such failures are recoverable with a disk check on startup then that’s much better than a worn out SD card.

To potentially improve things further the IPE Debian operating system could be put on a read only partition as is currently done with the oem gateway and the data could be placed on a write partition which could use the ext2 or fat32 filesystem both of which are non-journaling. 

Redis branch on github
If you'd like to try out the redis branch its up on github here:
You will need redis-server installed and phpredis:

Documentation highlight: Solar PV power diversion PLL

$
0
0
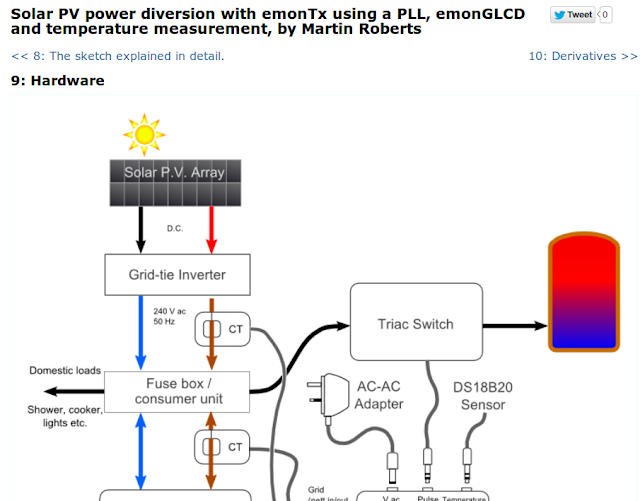
I would like to highlight the recent addition of some really great documentation written by Robert Wall and Martin Roberts detailing Martin's Solar PV power diversion implementation which uses an emonTx running PLL based firmware,an emonGLCD and temperature measurement.

You can find it here http://openenergymonitor.org/emon/pvdiversion/pll
and its linked through from the main guide.


Documentation highlight: Application guides

$
0
0
To try and bring the work on the application guides more to the fore, I've rearranged the openenergymonitor guide bringing the application guide list up to the top of the page.


There you will find Robin Emley's documentation on his MK2 PV diverter and Martin Robert PLL PV diverter documentation. I have also made a start on updating the heatpump application guide and writing a guide on building thermal performance monitoring.

Here's the full application guide list so far:

Home Electricity monitor
Solar PV Monitoring
Diverting surplus PV Power, by Robin Emley
Solar PV power diversion with emonTx using a PLL, emonGLCD and temperature measurement, by Martin Roberts
Building thermal performance monitoring and modelling
Heatpump Monitoring
Solar Hot Water monitoring and control

Hardware Manufacture Begins! Part 1: emonTH Temperature and Humidity Node

$
0
0
It's a busy for weeks for us at the moment. If you've been following us on twitter you will have see in the last week we have had the production PCB's designs for the emonTx V3, emonTx Shield SMT and emonTH (temperature and humidity) back from our manufactures. This coincided with manufacture of all three units starting this week.

Even though the designs have undergone several iterations and have been extensively tested over the past 12 months or so it was still a nail biting moment assembling, powering up and testing the final designs. Luckily it all went smoothly and all functions on all three designs seem to be working exactly as planned..just as well since we have 500 PCS of each!

Final designs for emonTx V3, emonTx Arduino Shield SMT and emonTH all working!
Last week I traveled over to Ciseco  in Nottingham to oversee starting manufacture of the emonTH Temperature and Humidity monitoring node. Ciseco have come a long way since I first visited them over a year ago. They've moved new offices, upgraded their pick-and-place machine and picked up a few more pairs of hands along the way. 

Here's a few photos of the manufacture of the emonTH:

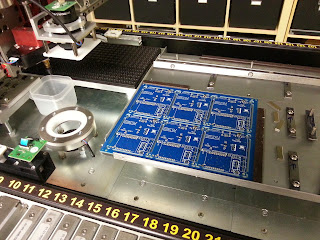
Step 1: solder paste being applied

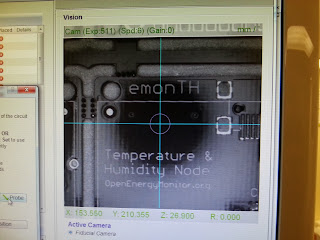
Step 2: Setup the pick-and-place to identify the 'fiducials' on the emonTH...Google it! If you look hard you will see these little shiny round marks on all SMT boards.


Step 3: practice placements


Step 4: let the pick-and-place do it's stuff! I love watching machines at work

Step 5 & 6: Reflow the board in the oven then add the thru-hole bits

Step 7: Test, test and test! Here's show's testing of the RFu328 (ATmega328 MCU + Radio) modules 

Step 8: Done!

Unfortunately we had a few issues during step 7; a some of the RF12B's which were reflowed onto the RFu328's were not working as they should. We think this was down to the large MCU package on the RFM12B absorbing more heat during the reflow process than expected. For the next batch we will look at tweaking the reflow oven's temperature profile. For now we will be hand soldering the RF modules. These sorts of niggles are not uncommon in manufacture, this is why testing is so important. We will be testing the units at several stages before they're shipped to ensure all functions are working. 


emonTx V3 final production design ready to go! 

The emonTx V3 and emonTx Arduino Shield are now in our shop on pre-order. The emonTH should be in the shop in the next few days (just waiting to tie down pricing). We hope to start shipping at the end of this month (November), so hopefully everyone who want's one should get them in time for Christmas. Documentation for all the units is slowly coming together, please bare with us during the next week or so; we hope to have all the documentation and open-source designs ready for we start shipping. Likewise it would be most helpful if you spot any typos (or screaming errors!) in the shop description or wiki documentation please let us know. If you want to take a look the Arduino compatible firmware code for all three units has been pushed to GitHub.

I'm currently on on the train down to London ready to travel to Cambridge tomorrow to meet with another manufacturer and begin manufacture of the emonTx V3 and emonTx Arduino Shield. Stay tuned for another post in the next couple of days! I will also try and tweet some sneak-peak photos of the manufacturing process as it happens tomorrow. 


Hardware Manufacture Begins! Part 2: emonTx V3 and emonTx Arduino Shield SMT

$
0
0
This morning I visited Kaizen Technology in Royston near Cambridge. They're manufacturing the emonTx V3 and emonTx Arduino Shield SMT energy monitoring nodes. We choose Kaizen since we have worked with them before to supply us with components and as far as manufacture goes that have very good capabilities. They are able to perform wave soldering to automate the soldering of thru-hole components. This keeps the cost down on a board like the emonTx V3 where there are many thru-hole connectors. 

Since the emonTx Arduino Shield has got thru-hole components which are inserted from the rear of the board this could not be wave soldered. To keep cost down we will be shipping the emonTx Shield with only the SMT components placed and the thru-hole components supplies as a kit. The emonTx V3 will be fully assembled (SMT + thru-hole), apart from the RFu328 to retain user flexibility as some users might want to use an SRF instead of the RFM12B or even use a different MCU in place of ATmega328. 


Mm lots of components


Video showing solder paste being applied and pick-and-place doing it's thing

Checking the placements with the pick-and-place camera

Big re-flow oven, wave soldering machine on the right hand side
Manufacture of the emonTx V3 and emonTx SMT shield should be done by the end of this week and we expect to receive them next week. We hope to start shipping the pre-orders soon after: http://shop.openenergymonitor.com/sensor-nodes/

Fully assembled emonTx V3, emonTx Shield SMT and emonTH

Complete emonTx V3 energy monitoring node

New hardware is in the shop and starting to ship this week

$
0
0
If you have been following the blog and twitter over the past couple of weeks you will probably have noticed that we've been gearing up for and starting manufacture (part 1 and part 2) of a trio of new hardware units:
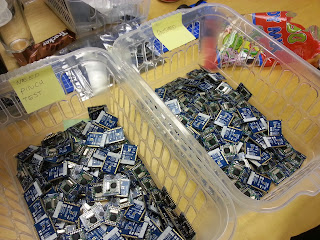
1. emonTx V3


The emonTx V3 is our new flagship energy monitoring wireless node. Thanks to community contributions and user feedback we've improved on the previous through-hole emonTx design while trying to keep as much flexibility and user customisation potential as possible.


Full emonTx V3 system with 4 x CT-sensors an AC-AC power adapter: Real Power, Power Factor and VRMS measurements


Hardware
The unit uses the same Atmel ATmega328 Arduino compatible microprocessor and all free I/O pins have been made accessible on a screw-terminal block for easy expandability.

Apart from the obvious change in enclosure and move to SMT pre-assembled electronics, the most notable hardware improvement is the addition of an AC-DC circuit. This enables the emonTx V3 to be powered from a single AC-AC plug-in adapter while simultaneously providing an AC voltage sample for VRMS and Real Power measurements.

emonTx V3 with ATmega328, RFM12B and on-board 3 x AA batteries


Software
Instead of having a separate firmware sketch example for each function as we had with the emonTx V2 (e.g. Real Power (CT123_voltage), Apparent Power (CT123), Temperature etc.) we have for the emonTx V3 made progress combining all these into one 'auto-adaptable' piece of firmware. We have called it emonTxV3_discrete_sampling, it's  based on EmonLib but no longer relies on the internal bandgap of the Atmel chip for ADC measurements. This will increase ADC accuracy and reduce the need for additional calibration. The main features of the firmware at present are:


  • CT detection – only sampling from required channels
  • Power supply detection & presence of AC-AC adapter – VRMS and Real Power measurements are enabled if powering from AC-AC adapter and power saving mode is enabled of powering from batteries
  • Temperature sensor detection – external DS18B20 temperature sensors are auto detected and temperature readings added to measurements


The name 'discrete sampling' was used to draw distinction between the EmonLib based discrete sampling approach and Continuous Sampling. A Continuous Sampling PLL example is included in the emonTx V3 examples, after some testing we hope to integrate this into the main firmware: the emonTx V3 could switch to a more accurate continuous sampling mode when powered from AC-AC adapter of 5V DC USB.

The emonTx V3 is now available from the OpenEnergyMonitor shop. 

2. emonTH 

Wireless Temperature and Humidity Node

emonTH Temperature and Humidity Node

The emonTH is a new unit to replace the Low Power emonTx Temperature node (which was bit of a cludge!).

emonTH installed in my house, I will be keeping a close eye on temperature and humidity in my house over the winter in North Wales

Working with community groups like the Manchester Carbon Coop who are involved in retro-fitting houses with insulation we realised the need for an easy to deploy, long lasting temperature and humidity monitoring node. Many emonTHs can be deployed thought a house or building to inform a building performance model, heating control system or just for general interest! The emonTH supports DHT22 and DS18B20 sensors as well as simultaneous indoor and outdoor temperature readings using a remote DS18B20 sensor wired into terminal block.

As with the emonTx the data is logged via a web-connected base station to emoncms server for logging, graphing and analysis. As with all our hardware, the emonTH is open-source and Arduino IDE compatible using the ATmega328 with the Arduino serial bootloader.


The emonTH comes pre assembled and has an on board DC-DC converter to increase battery life.


The emonTH is now available from the OpenEnergyMonitor shop. 

3. emonTx Arduino Shield SMT


Arduino compatible energy monitor shield add-on. 

emonTx Shied SMT on Arduino Leonardo

For prototyping and lab experiences an Arduino is a great tool to quickly try something. The emonTx Shield allows energy monitoring functions to be added to a standard Arduino Uno / Leonardo or Yun as well as a Nanode RF. As with all our hardware units we provide as many software examples to help you get up and running. The emonTx Shield SMT uses Surface Mount (SMT) pre-assembled electronics. To keep costs down the through-hole components (headers and connectors) require manual solder assembly.

The emonTx Shield SMT is now available from the OpenEnergyMonitor shop. 


2013 Christmas Ordering Info - Royal Mail Last Posting Dates for Delivery before Christmas

$
0
0
It's that time of year again! We're busier than ever with the launch of our new hardware modules this week.Thanks to everyone who's helped support the project by ordering through the shop or contributed to the project in some way shape or form. All pre-orders for the new hardware will have been shipped by beginning of next week. 

Since I last posted a similar post this time last year we have shipped over 2500 orders and have moved into a new office

Here are the last posting dates for delivery in time for Christmas according to Royal Mail. We will continue to ship right up until Christmas but to avoid disappointment if you would like your items before Christmas please get your order in soon! 

International Airmail including
Airsure® and International Signed For™

Wednesday 4 December Asia, Far East (including Japan), New Zealand
Thursday 5 December Australia
Friday 6 December Africa, Caribbean, Central & South America, Middle East
Monday 9 December Cyprus, Eastern Europe
Tuesday 10 December Canada, France, Greece, Poland
Friday 13 December USA
Saturday 14 December Western Europe (excluding France, Greece, Poland)

UK Services  
Friday 20 December 1st Class
Monday 23 December Royal Mail Special Delivery Guaranteed™

We will also be shipping between Christmas and new year and as soon as the postal system opens again beginning of Jan. 

We will hopefully get another post up when I have a bit more time over the festive period taking stock of the year; what we've achieved and our aims and hopes for next year. Until then, here's a quick couple of photos from the office today:


emonTH assembled PCB's tested, firmware uploaded and ready to go
Trystan's been testing a setup with Raspberry Pi with RFM12Pi running emoncms on an external hard drive, potentially a great low cost solution for home emoncms microserver with robust logging and local storage...expect blog post and HDD image soon


emonTx V3 cases getting ready to ship..in case you're wondering, yes we did give that poor suffering plant in the background some water later today!


Trystan and the the dev bench


Myself and Trystan 'working', I should add that I'm doing'Movember' , only a few more days to go, please donate, it's for a good cause

Printing postage for order parcels

Order fulfillment 

Adding control to emoncms: RFM12b Packet Generator

$
0
0
I've had many conversations with people recently about controlling things like radiator set points, boiler thermostat's, heatpump's and so on.

I visited John cantor of http://heatpumps.co.uk/ today who is implementing an impressive control and monitoring system for a heatpump central heating system which involves EmonGLCD's with relay's connected to radiator valve actuators in each room. The buttons on the EmonGLCD are used to set the target temperature for the room and information is displayed on the EmonGLCD about heatpump power input and outside temperature.


On the way back I stopped at the Centre for Alternative Technology where Marnoch who is on their student placement there is working on doing something similar but for a radiator system connected to a wood chip boiler.

Both Glyn and Ynyr are keen to get boiler thermostat controllers working in their houses and Ken Boak who designed the NanodeRF phoned up the other day suggesting we start an openenergymonitor sub project and discussion on this topic, Ken's been working on central heating control for quite some time.

Its something I have a growing interest in too as we will be soon installing a heatpump system at home which has a lot of opportunity for control and monitoring to make sure its running efficiently.

So I've been giving some thought to how control features could be added to emoncms in a more integrated way than initial efforts I've made before.

I like the simplicity of the way Jean Claude Wippler designed the jeelib library to use c structures as the method in which data is packaged and sent via the RFM12b radio's and so I thought that maybe a good basis for adding control functionality to emoncms would be to first make it possible for emoncms to easily generate RFM12b data packets in the format that can be easily decoded with a struct definition on the listening control nodes. Emoncms would then broadcast this control packet containing all the state information about the system at a regular interval in the same way as an emontx broadcasts it's readings. Listening nodes can then be programmed to selectively use variables in that control packet depending on what they need to do.

I've put together an initial working concept of a module that can be used to do this and its up on github here: https://github.com/emoncms/packetgen

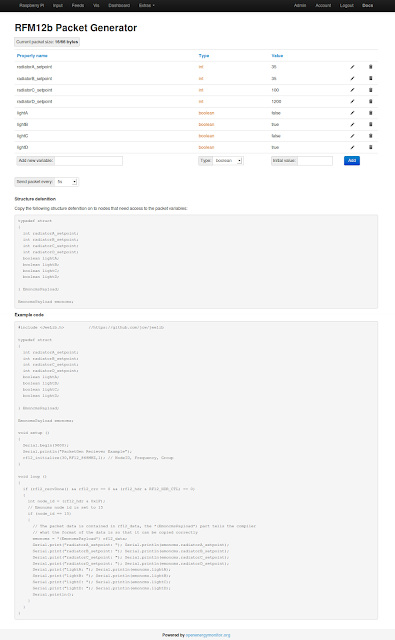
Here's a screenshot of the main interface:


One of the nice things about it is that as you generate your control packet the module generates example Arduino code to make it easier to start coding a control node, you can just copy the code any drop it into the Arduino IDE and upload to a atmega+rfm12b based node and it should start receiving the control packet right away.

I see this module and control in general being run on a local installation of emoncms running on a raspberrypi + harddrive combination rather than emoncms.org. The next step is an image with all this installed and working out of the box.


Viewing all 196 articles
Browse latest View live